
Appearance
Neon Integration
LecturePanda integrates with NeonCRM so you can get the most out of both systems.
Benefits of Enabling this Integration
- Ensures your LecturePanda participants have a corresponding account in your NeonCRM database.
- Streamlines participant registration by prepopulating the registration type, name and email address based on member data from Neon.
- Allows you to flex pricing based on participant membership level/status.
- Syncs registration data from LecturePanda into NeonCRM.
Enabling The Interface
1. Gather Info
The Neon configuration screen covers two separate integrations, and their credentials come from two different places. Collect what you need for the parts you'll use:
| Integration | What it does | What to gather | Where it comes from |
|---|---|---|---|
| Neon AMS | Member lookup and pricing at registration | Org ID, API Key | Your own Neon CRM account, steps below |
| Neon Pay | Processes registration payments | Merchant ID, Public Key | Neon Pay support — request these |
If you're only using Neon for membership checking, the Org ID and API Key are everything you need.
Request your Neon Pay credentials first
The Merchant ID and Public Key are the one part of this setup that depends on someone else's response time, so it's worth sending that request before you work through the rest. Everything below you can do yourself in a few minutes.
Locate Org ID
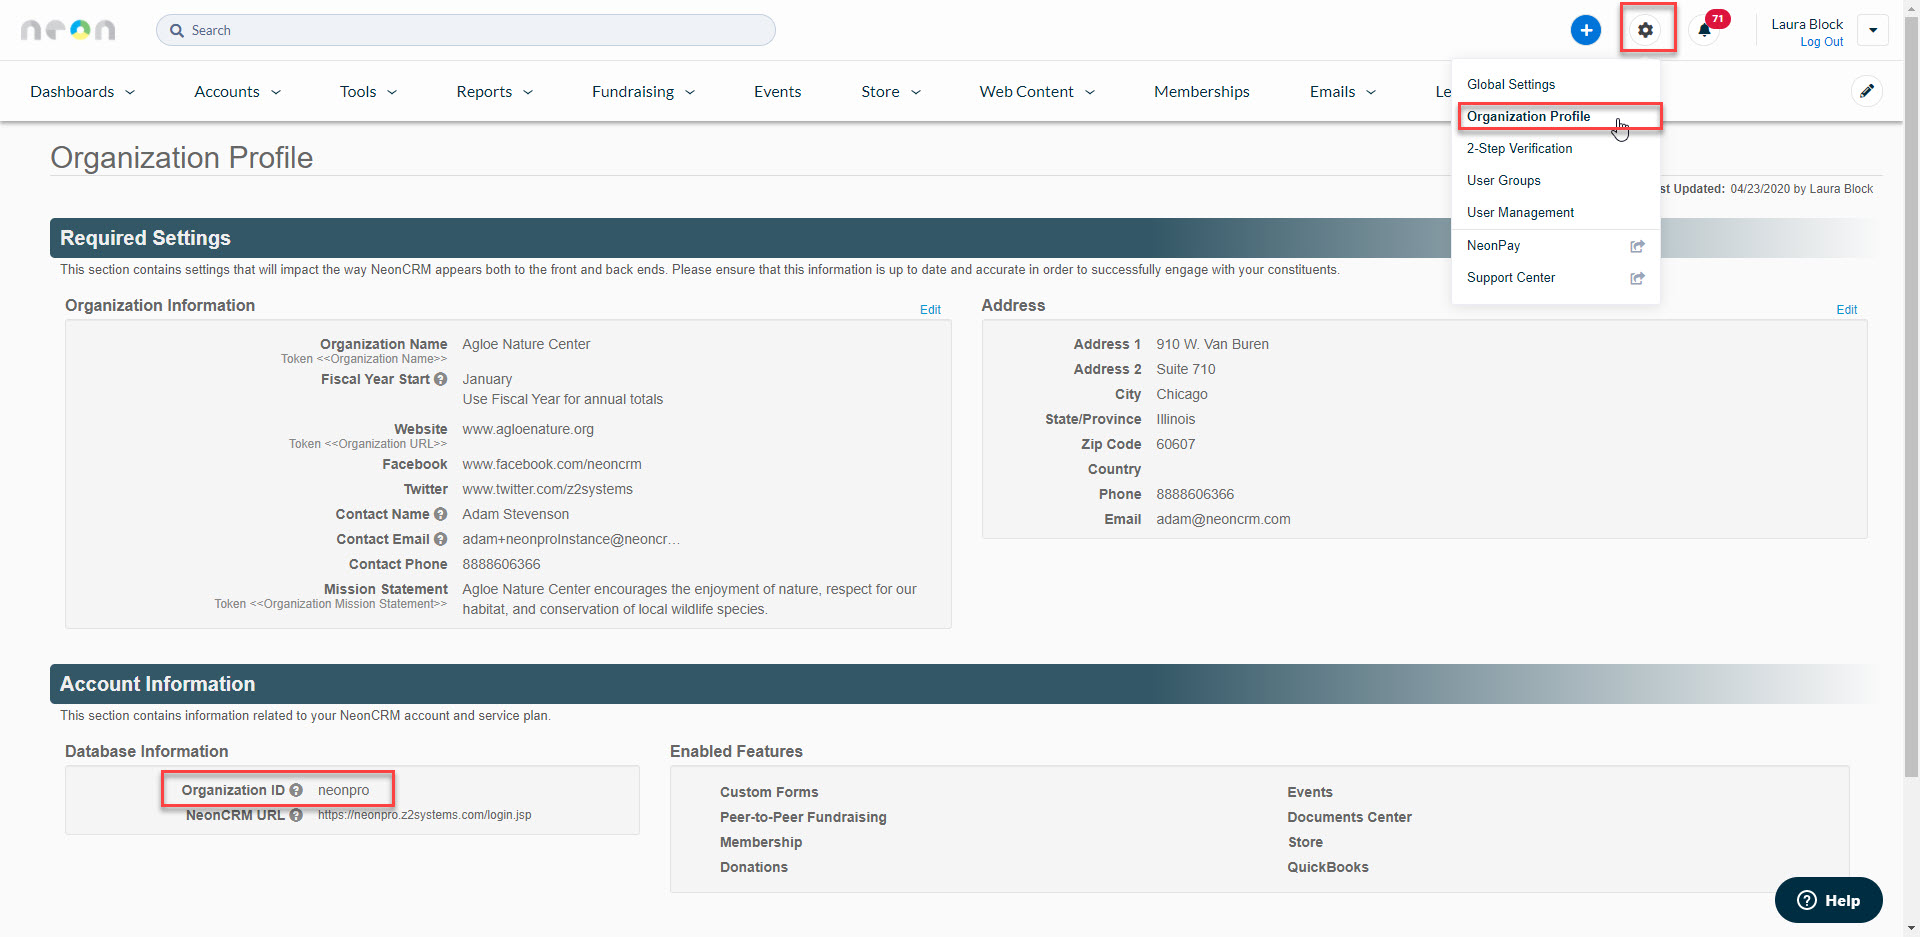
To locate your Org ID, log in to NeonCRM and go to Settings > Organization Profile. The Organization ID will be at the bottom left, under “Database Information.”
Create an API Key
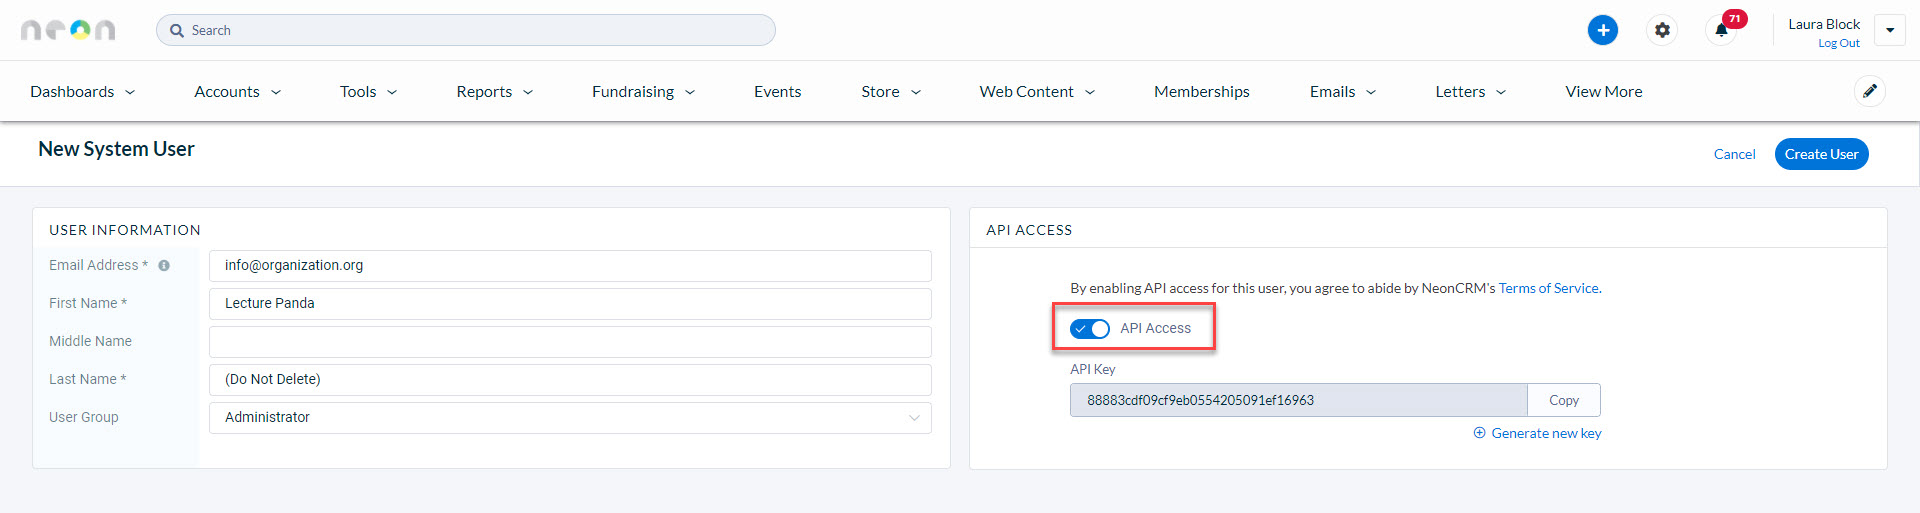
To set up an API key, go to Settings > User Management > Add New User. We recommend creating a generic user account that will never need to be deactivated.
For example, you could name the account “LecturePanda (Do Not Delete)” and connect it to the email address info@yourorganization.org.
Click the toggle for API Access, copy the API key, and click “Create User” at the top right.
INFO
If you have not yet set up your Membership Levels in Neon CRM, refer to this guide for detailed instructions.
Request your Neon Pay credentials
Only needed if you'll take registration payments through Neon Pay.
Contact Neon Pay support and ask for your Merchant ID and Public Key.
Ask Neon Pay specifically, not Neon CRM
Neon Pay and Neon CRM are separate teams, and Neon CRM support generally can't supply Neon Pay credentials — a request sent to the wrong queue usually comes back empty, which is the most common reason this setup stalls. Say "Neon Pay" in your request and you'll reach the right team.
A public_ prefix on the public key is normal — that's what a Neon Pay public key looks like, not a placeholder to strip off.
Coming from a single-purpose processor like Authorize.Net or Stripe, expect two sets of credentials here rather than one.
2. Create a New Event
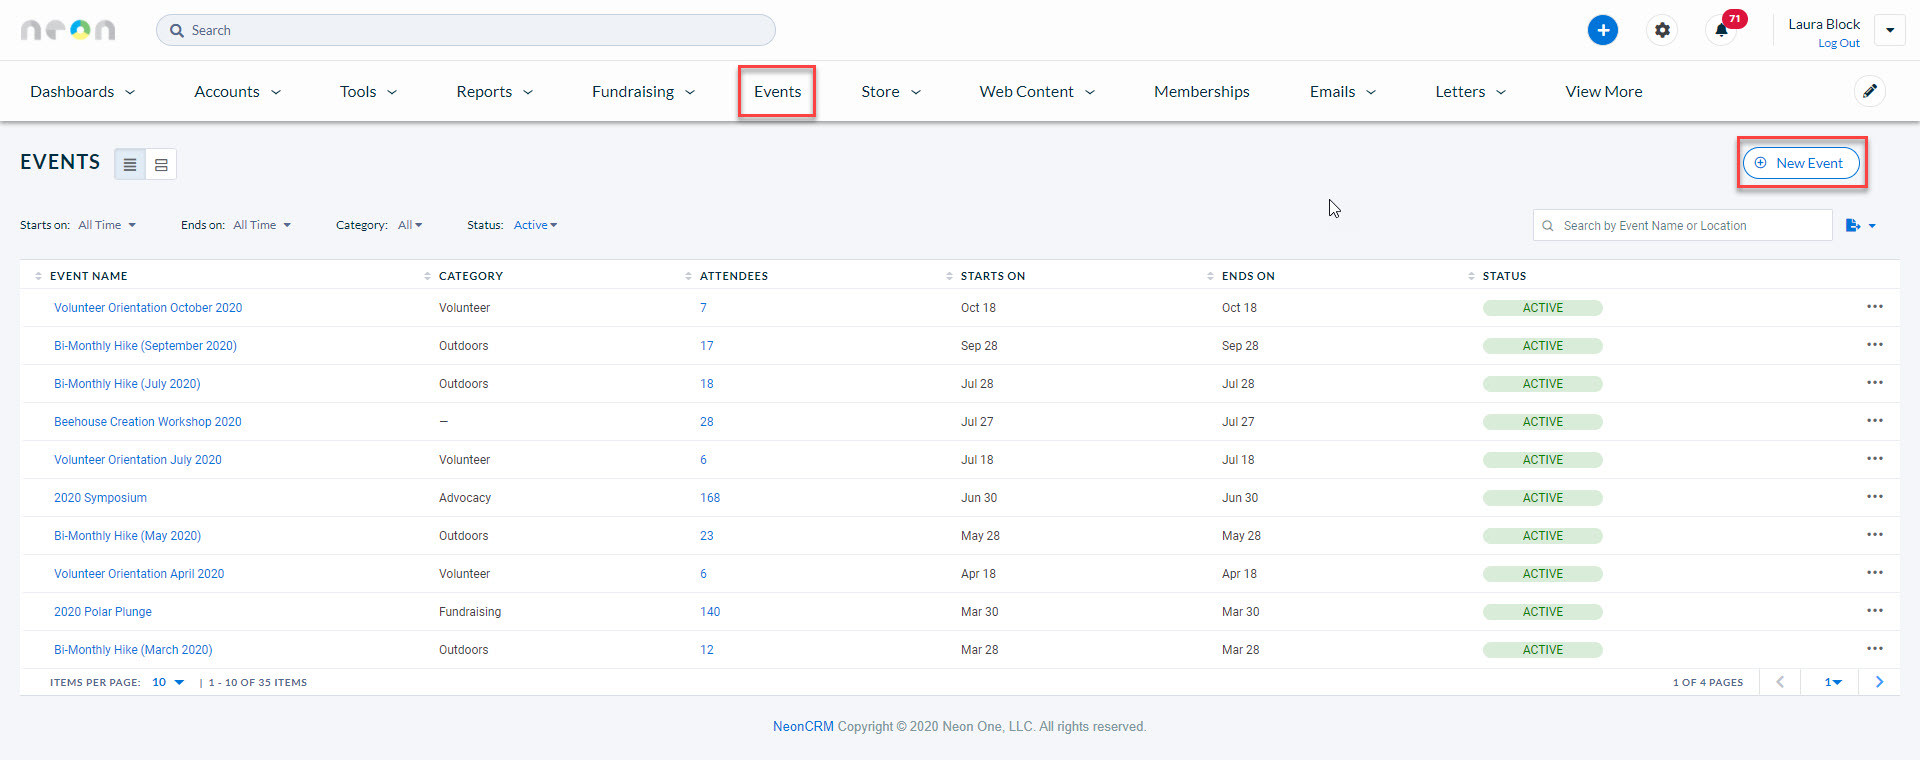
Next, we need to create a new event in NeonCRM. To do this, log in to NeonCRM and go to Events > New Event.
After that, add information about your event. You must at least enter the Event Name, Event Start Date, Event End Date, and one of the Financial Settings (see table below).
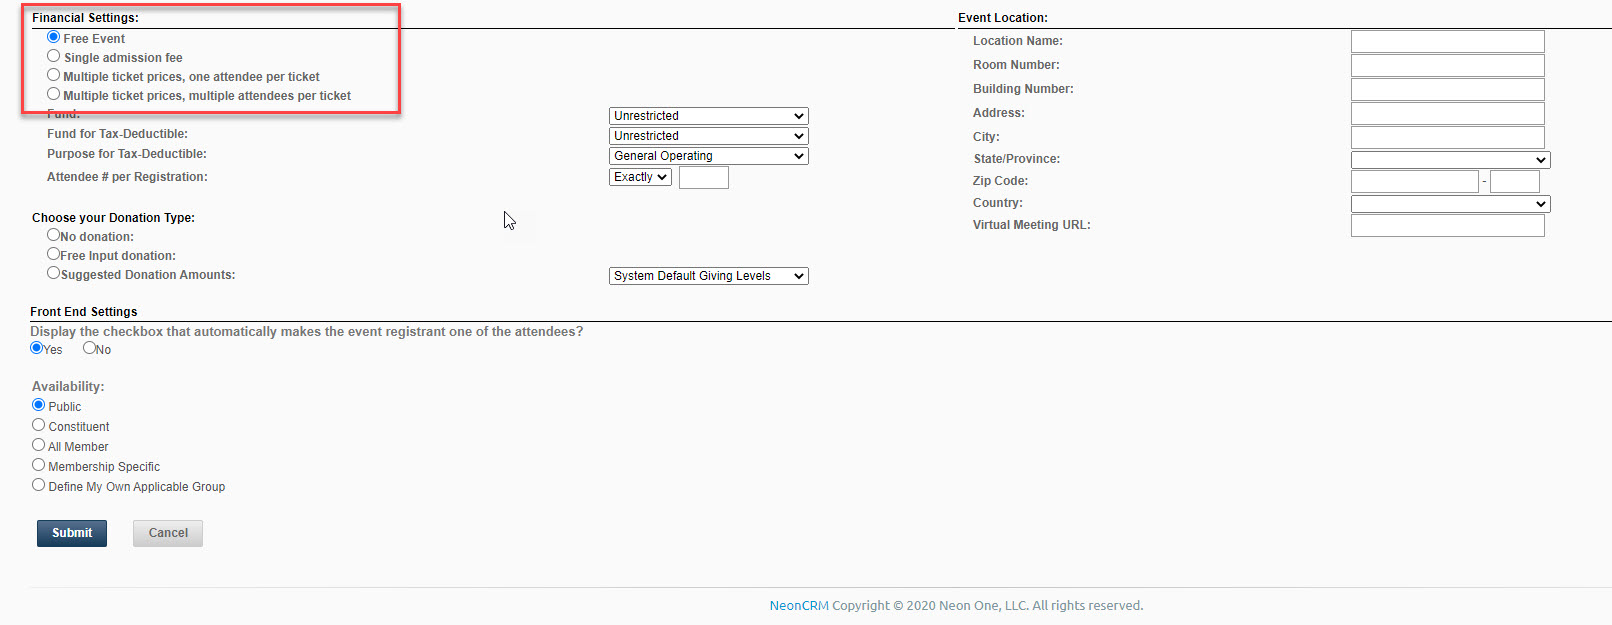
Free Event
The event has no cost — you are only tracking RSVPs.
Single admission fee
All attendees are paying the same price and receiving the same training.
Multiple ticket prices, one attendee per ticket
Attendees may choose from several different pricing options or training options.
Multiple ticket prices, multiple attendees per ticket
Similar to the previous option, but in Neon CRM this allows groups to register together for a set price. You do not need to use this option for LecturePanda-integrated events, but if you choose this option it will work identically to the “multiple ticket prices, one attendee per ticket” setting.
Click “Submit” to create your event.
INFO
If you select either “Multiple ticket prices, one attendee per ticket” OR “Multiple ticket prices, multiple attendees per ticket”, you may also set up ticket options in Neon to correspond to your pricing rules in LecturePanda. This is optional, but can be useful if you would like to be able to run reports in Neon CRM based on attendees’ specific lecture choices.
3. Set Up Tickets (Optional)
To set up tickets, scroll down to the Ticket Prices section inside your event in Neon CRM. Click "New price"
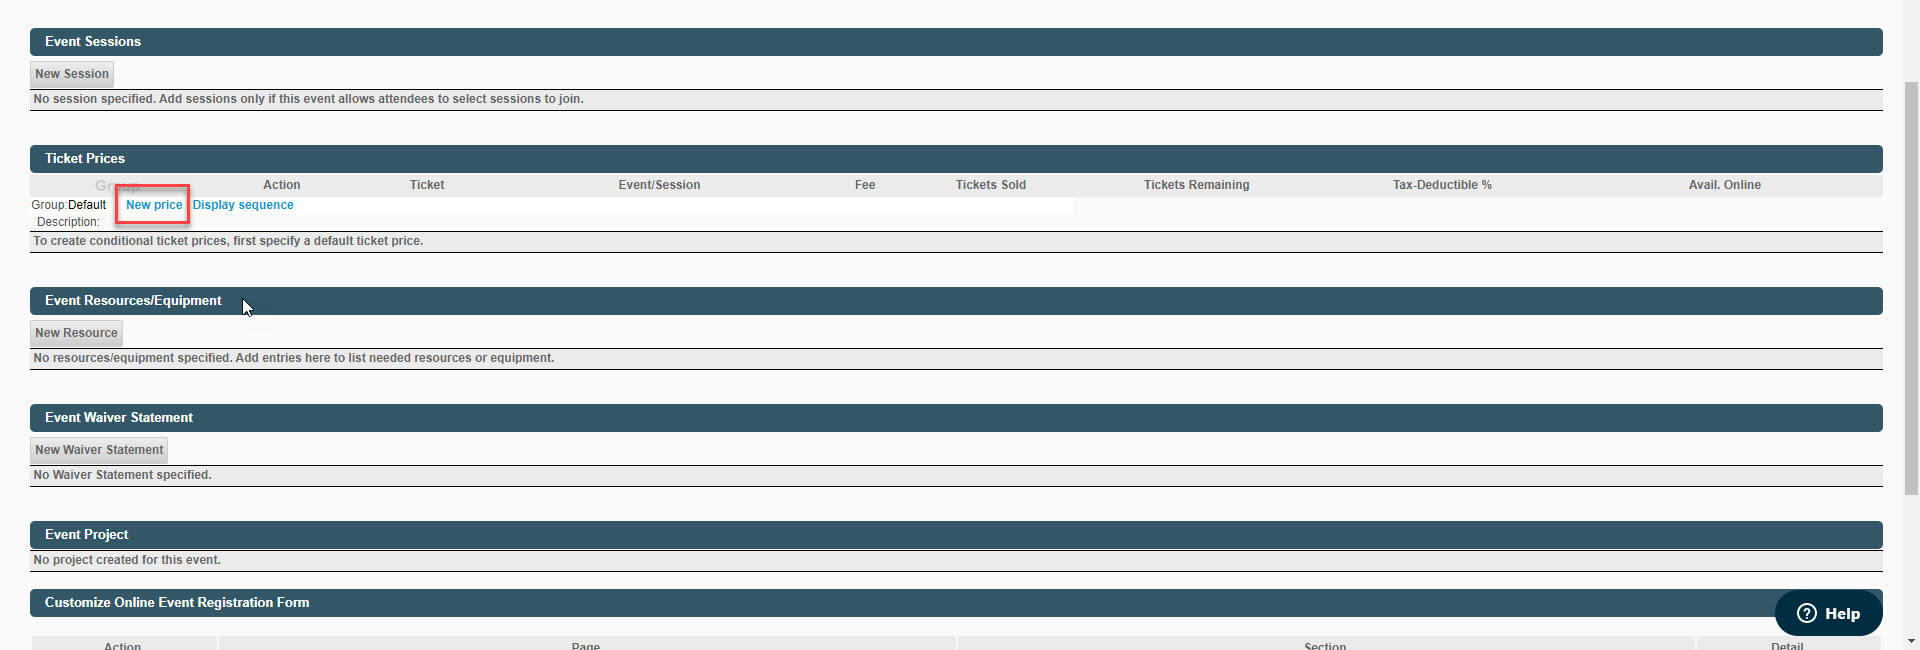
Enter the ticket’s name and fee amount, then click “Submit”. Create a new ticket for every financial option you will be offering.
4. Add Neon in LecturePanda
Log in to LecturePanda and navigate to Organization Settings > NeonCRM > Add NeonCRM Account
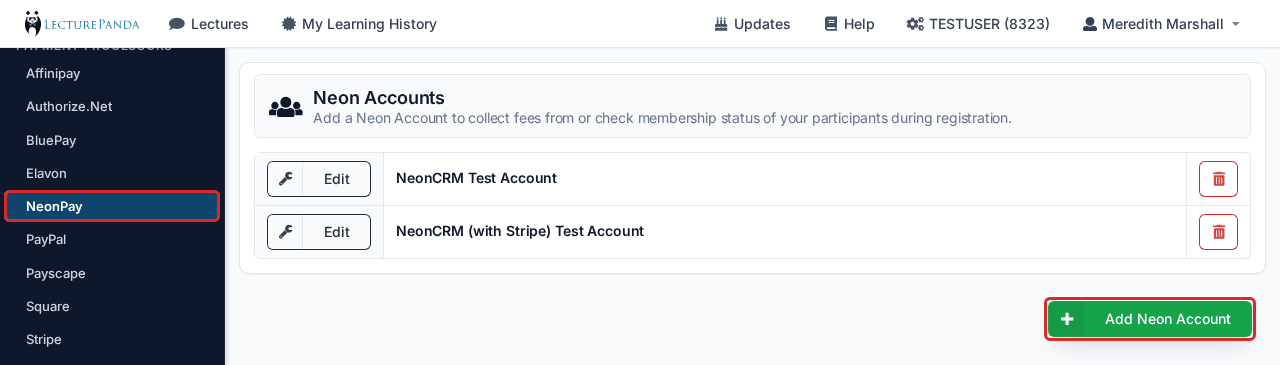
Fill in the required information in the form. Detailed descriptions of each field are below.
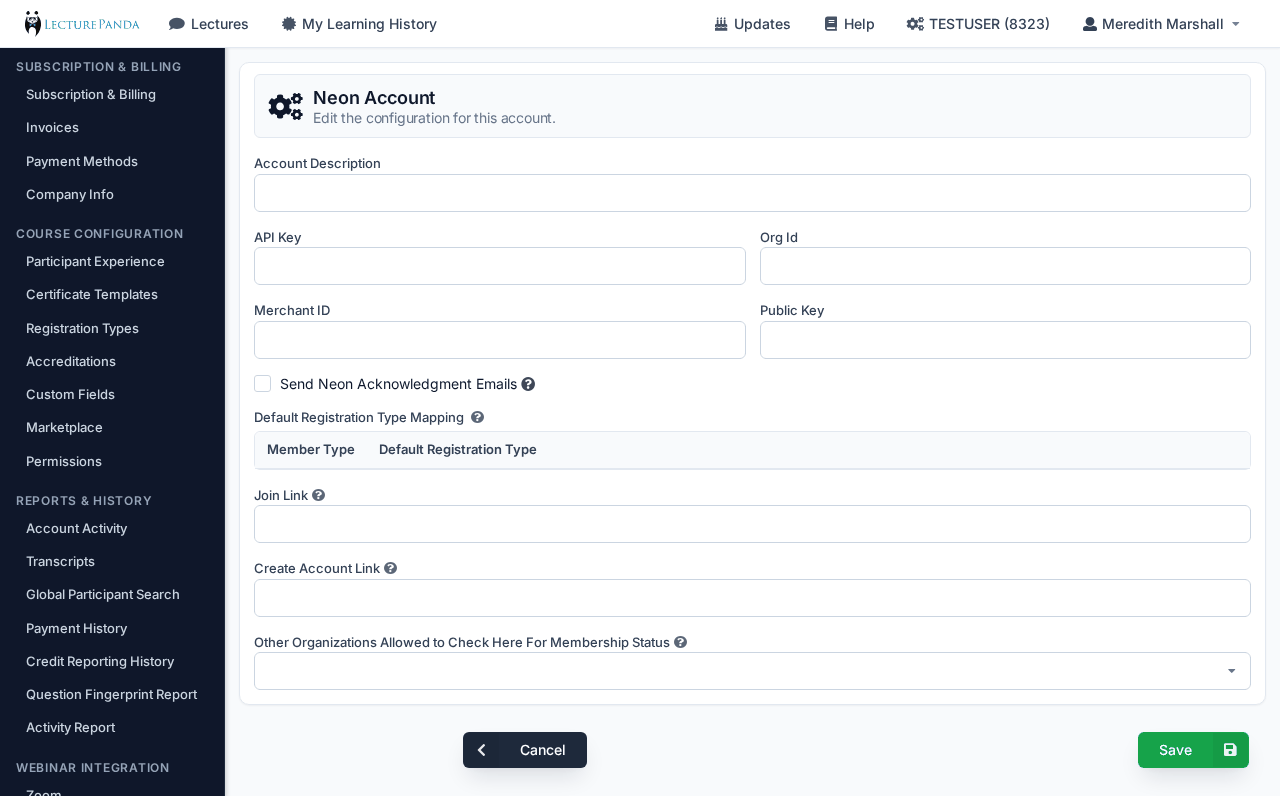
Account Description
This is how your Neon database will be identified to your participants. It’s often good to put the name of your organization here for clarity.
API Key
Enter the API Key obtained in Step 1.
Org ID
Enter the Org ID obtained in Step 1.
Merchant ID and Public Key
Only if you're taking payments through Neon Pay. Enter the two values Neon Pay support sent you. Leave both blank if you're using Neon for membership checking only, or if another processor handles your payments.
Default Registration Type Mapping
A mapping of NeonCRM membership levels to LecturePanda Registration Types. Leave this blank for now — it will autopopulate when you save.
Join Link
A URL where your participants should be directed if they want to become members of your organization.
Create Account Link
A URL where your participants should be directed if they do not have an account in your NeonCRM database.
Other Organizations Allowed to Check Here For Membership Status
Leave this blank for now. If you partner with another LecturePanda customer you can ‘share’ this integration with them through this setting.
Click the “Save” button.
Now you are ready to start using this in the setup of your lectures!
Using the Interface
To use the interface, first you will create an event in NeonCRM as normal. Then, you will add pricing rules to your lecture that reference this event — on the Payments tab, or Registration › Pricing in the course builder; the rule form is the same in both. Once a Neon account is connected, the pricing rule form gains up to three new fields (described in more detail below):
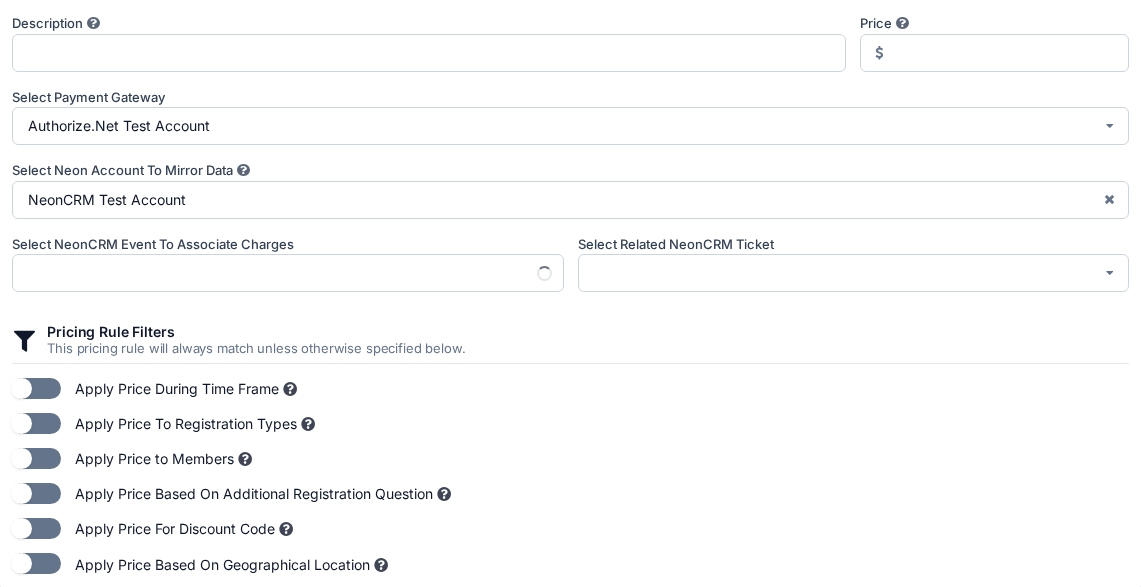
Select Neon Account To Mirror Data
This is the name of the NeonCRM database of reference. It appears when the rule charges through a different payment gateway — pick your Neon account here and the two event fields follow. If the rule's Select Payment Gateway is your Neon account itself (Neon Pay), this field isn't needed and the event fields appear directly.
Select NeonCRM Event To Associate Charges
This is the name of the corresponding NeonCRM event where the data from this lecture should be sent. Start typing into the field to run a search on your existing NeonCRM events.
Select Related NeonCRM Ticket
The name of the ticket (if any) that should be assigned in NeonCRM if this pricing rule matches.
You're all set!
Now, any participants who match with a pricing rule that uses your NeonCRM membership data will have their registration data transmitted into your NeonCRM database and stored under the created NeonCRM event.
Additionally, all participants will have their membership status validated against your NeonCRM database during the registration process.
What syncs, and what doesn't
The registration sync works cleanly enough that people reasonably assume completions follow it. They don't.
Pushed to Neon:
- Account creation and matching — registering in LecturePanda creates or matches the Neon account
- Registration data, into the Neon event's registration records
- Member lookup, for dynamic member pricing
Not pushed to Neon:
- Course completion
- CE credit earned
- Certificate issuance
There's no CE-earned or courses-completed field that fills in on the Neon side, so a member's Neon record won't tell you what they've finished.
Getting completions into Neon anyway
Zapier's Course Completed trigger can map completion data wherever you want it in Neon. Until that's set up, completion and CE data lives in LecturePanda's reports — nothing is lost, it just isn't in Neon.
Adding Neon Pay later
If you already had Neon membership checking configured and are now adding Neon Pay, the API Key and Org Id are filled in already — that's expected, not a mix-up. Add the Merchant ID and Public Key from Neon Pay support alongside them and save.
Troubleshooting
Non-members get a payment error; members register fine
Neon Pay can't charge a registrant who has no Neon account. Members always have one — that's how membership lookup works — so the failure lands only on non-members, and the error is a generic API or payment-failed message that makes it look like a credentials problem.
The fix is to enable the setting that automatically creates a Neon account for non-member registrants. With that on, Neon Pay can process their payment normally.
The signature of this issue: members register successfully, non-members fail no matter which card they use, and your credentials and pricing rules all check out.
Charges aren't attributed correctly
Every pricing rule using the Neon Pay gateway must be linked to an event on the Neon CRM side — Neon's accounting attributes each charge to a specific event. The Neon event can be a bare shell; it just needs to exist so it can be selected.
Create the event in Neon CRM (naming it the same as the LecturePanda course makes it easy to find), then select it in the Select NeonCRM Event To Associate Charges field on the pricing rule. Fill in the ticket field too, or leave it as no tickets if you didn't set tickets up in Neon.
Credentials suddenly report as invalid
If a working integration starts reporting invalid credentials without anything changing on the LecturePanda side, check the Neon side:
- Is the API user still active? Neon automatically disables user accounts that don't have multi-factor authentication set up — and when the API user is disabled, its key stops authenticating. Re-enable the user and add MFA.
- Was the API key regenerated? A rotated key invalidates the old one. Enter the new key in LecturePanda.
Do members need a separate LecturePanda login?
Members don't need one. Registration is guest-based, so a member simply registers with the same email address as their Neon account — membership is validated behind the scenes on that email match, and their course access, certificates, and history attach to it automatically. One fewer password for your members to keep track of.
A LecturePanda account is available for any learner who wants all their courses and certificates gathered in one place, and it's entirely optional for taking a course. To get members started, share your registration link and let them sign up with their Neon email; the membership check does the rest.